Microsoft Excel has a lot of great functionality, such as the ability to protect your workbook or individual sheets to avoid users editing certain data fields and formulas. Protection is great because building an Excel workbook that’s filled with sheets, formulas, and data is a time-extensive task that you want to avoid starting over from scratch, while also setting guide rails when sharing with others.
However, what happens when you forget your own password and realize you need to make a few updates? You might think you’re totally out of luck, but there IS an option to unlock your sheet and avoid rebuilding all over again.
It’s a decent amount of steps, and might seem like an overwhelming process but it’s not too bad once you give it a try (should take only a few minutes once you get it down) – and it legitimately works. If you follow the steps in the guide below, you’ll be able to unlock any protected sheet in an Excel workbook and reset your password (if needed).
Continue reading below for a couple quick setup requirements, the steps, and a lot of images to guide you through the process.
This was tested on Windows 10 and 11 in August of 2022.
Setup
There’s a few quick things you want to make sure you can do first before tackling the unlock steps:
- Have Notepad. Might seem obvious that your PC has it, but you’re going to need it.
- Take note of the name of the worksheet that is protected. You’ll need to know this in order to remove the protection.
- Have Windows File Explorer set to Details View, and the View setting setup to show file extensions.
- To enable file extensions, when in a file folder click the ‘View’ drop-down in the File Explorer ribbon, expand the ‘Show’ option, and click ‘File name extensions’.

Unlock a protected sheet in Excel
Step 1 – Open up the Excel file you need to unlock that’s been protected.
Take note of the name of the sheet that’s protected. If you try to edit, the protected message appears.

Step 2 – Save a new copy of the Excel workbook so you have a backup.

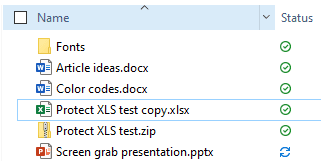
Step 3 – Go to the folder in Windows File Explorer where you saved the Excel sheets and find the file (ending with XLS or XLSX).
Step 4 – Change the file extension from .xls or .xlsx to .zip.
You can right-click the file name, then select Rename to edit. Your file should then change from something like “filename.xls” to “filename.zip”
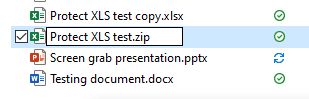
Step 5 – Click Yes when the warning message appears.
The Excel file will now look like a Zip file.

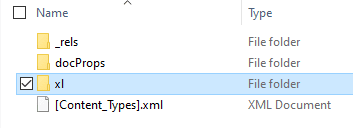
Step 6 – Open the new Zip folder you just created.

Step 7 – Open the XL folder.
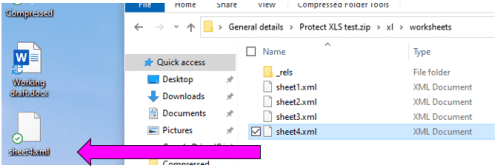
Step 8 – Open the Worksheet folder.

The file for each sheet will appear.

Step 9 – Drag the protected Sheet.xml file to the desktop.
You want to do this for the sheet that is protected that you want to unlock. Dragging to the desktop creates a copy on the desktop.
Step 10 – On the desktop, right-click the filed you just dragged to the desktop, then click “Open With”, then select “Notepad”

Step 11 – A lot of HTML looking code will appear when you open it.
This is normal. Don’t be intimidated by it.

Step 12 – Use the CTRL+F function to bring up the Find tool.
Step 13 – Search for the term “Protect”

This will jump you to the code you are looking for, which is a bracket that starts with <sheetProtection
Step 14 – Highlight and drag (select as if you were selecting text to copy), starting with the bracket in front of <sheetProtection all the way to the close of the same bracket >
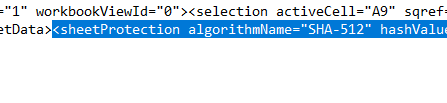

Step 15 – Click the Delete or Backspace key to remove that entire section of code.
Step 16 – Save the Notepad file you just edited, then close out of the file.
Step 17 – Go back to the Windows Explorer zip folder that has the original xml sheet file.
Step 18 – Delete the original xml sheet.

Step 19 – Drag and drop the file from the desktop that you just edited back into the original xml file folder.

This is where you changed from xls to zip.
Step 21 – Change the file extension from .zip back to .xls or .xlsx.

Click 22 – Click Yes when the warning appears again. The file will change back to and Excel file.
Step 23 – Open the file to test with an edit. You’ll see it’s not protected anymore!

Latest posts
- How to download or delete Apple Podcasts on iPhone
- The Best Productivity Tips and Tricks for Microsoft Excel 2022
- How Manage Today Screen Widgets on the Apple iPhone 13
- How Change the Apps on the Left Most Screen on an Apple iPhone
- How to Remove the Search Bar from the Lock Screen on the Apple iPhone 12