This guide shows you how to use the marker functionality in Microsoft Word (2022) to markup pages or highlight text with freeform highlighting. This is a helpful tool when providing feedback to partners or reviewing documents.
Writing with a marker in Microsoft Word is a great way to highlight forms, add a callout, or get creative. Using the marker function is also called ‘inking’ or ‘drawing’ and can be found from the Draw tab. This lets you ‘highlight’ with either a mouse, your finger, or a computer pen.
The steps on this page will show you how to highlight text and remove the highlight in Microsoft Word. Check out the guided steps below.
How to Highlight Text (Video Guide)
How to Highlight Text (Quick guide)
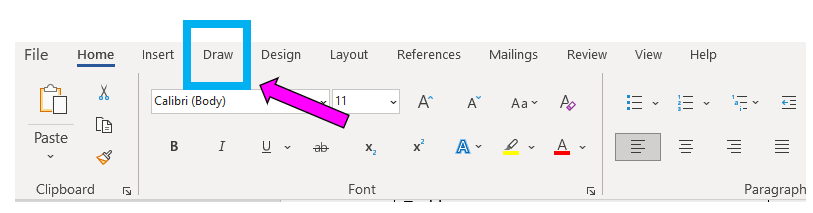
1) Access the Draw tab in Microsoft Word
In order to highlight a document, you’ll need to click the Draw tab in Word to bring up options.
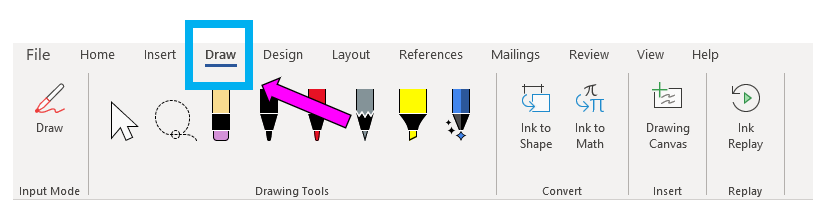
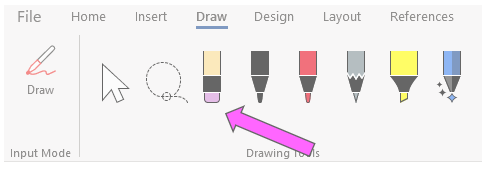
2) Select a marker option that you want to use to highlight
Click a Marker option. There’s a few default options, and you can customize them with the Color and Thickness drop-downs.
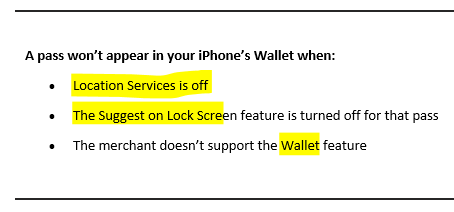
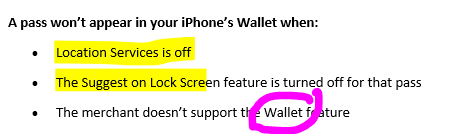
3) Use the marker to highlight text
Use your mouse, finger, or computer pen to start highlighting text on the document by tapping and dragging.
4) Erase highlight
- From the Draw tab, click the Eraser icon.
- Click the object or text that you’ve highlighted.
- The eraser will remove the entire object that is connected.
How to Highlight Text (Guide with images)
You can highlight text with the marker function in Microsoft word in few simple steps.
Step 1 – Access the Draw tab in Microsoft Word
In order to highlight a document, you’ll need to access the Draw tab in Word.
Step 2 – Select a marker option
There’s a lot of different options available to write in Word, from selecting a marker type, to thickness, and even mapping it to a shape.
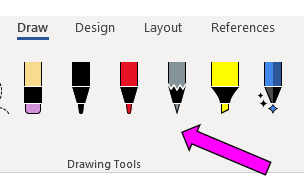
Click a Marker option. There’s a few default options, and you can customize them with the Color and Thickness drop-downs.
Step 3 – Use the marker to highlight
Use your mouse, finger, or computer pen to start highlighting on the document by tapping and dragging.
Continue to the next step so you can learn how to erase any highlights if you don’t like how they came out.
Step 4 – Erase highlight
You can erase highlights on a Word doc using the eraser. This can help with any mistakes or as you get familiar with using the functionality.
- From the Draw tab, click the Eraser icon.
- Click the object or text that you’ve highlighted.
- The eraser will remove the entire object that is connected.
How to use the highlighter in MS Word 2016
If you’re looking for a different version for MS Word, check out the 2016 guide: How to Use a Highlighter in MS Word (2016)